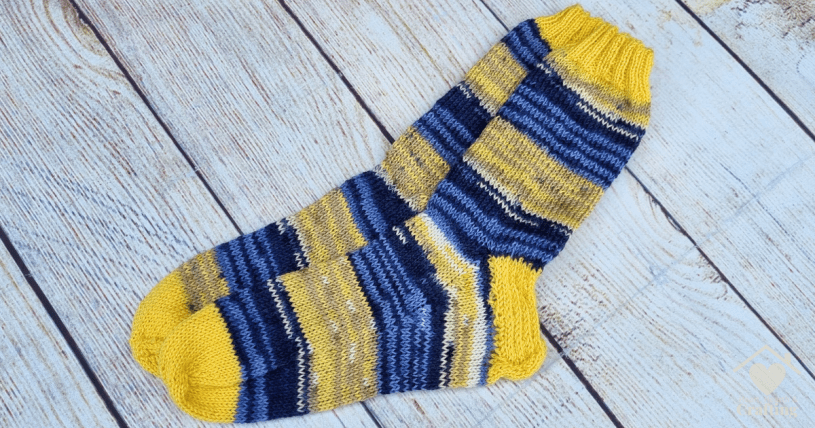
Soft and Warm – Hand knitted socks are a real treat for your feet. Follow my simple free sock knitting pattern and learn how to knit your own colourful top down socks in children’s and ladies sizes. Your hand-knitted socks will feature contrasting cuffs, heels and toes for a really fun feature that’s easy to knit.
Materials
This pair is knitted from acrylic yarn from KnitCo. I picked up this yarn purely because it was very cheap and I wanted to treat myself to some new sock yarn colours. I regret my choice. Hardly surprising really. The yarn is nice to knit with and the colours are lovely. But unfortunately my newly knitted socks have felted in the first wash. I’ve switched to washing them by hand which is a royal pain in the bottom. I hate having to remember not to put them in with the rest of my washing. And that feeling when they fall out of the washing machine, shrunk yet again. Gutting.
So if you’re following this pattern and knitting your own socks then please learn from my mistake and stick to quality sock yarns. West Yorkshire Spinners and James C Brett are my current favourites. They do some beautiful colours too and their yarns wash and wear beautifully.
![How to Knit Your Own Sunshine Socks [Free Knitting Pattern]](https://hearthearthcrafts.com/wp-content/uploads/2025/04/blog-image-craft-sock-ladies-sunshine.png?w=1024)
This free sock knitting pattern is suitable for all 4ply sock yarns. Ideally the tension should be 28 stitches and 36 rows to form a 10cm / 4 inch square swatch.
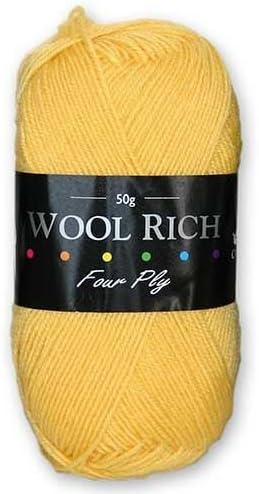
For the contrasting cuffs, heels and toes I have used Truly Wool Rich 4ply yarn from Cygnet. It’s 75% Wool and 25% Polyamide and is fully machine washable.
I use this yarn a lot for contrast on my hand knitted socks. It’s sold in 50g balls which is just right for four pairs of ladies socks, when combined with 100g balls of patterned yarn.
I use 3.25mm double pointed needles for the main sock knitting and 3mm double pointed needles for the cuffs. You could use the magic loop method with this knitting pattern, personally I prefer to use double pointed needles but it’s totally up to you.


Free Knitting Pattern
This knitting pattern includes three sizes. The larger sizes are shown in brackets. You might find it helpful to highlight or circle the size you’d like to make before starting to knit.
UK Shoe size 8-12 Small Child (1-3 Large Child, 4-7 Ladies)
Knitting the Sock Cuff
![How to Knit Your Own Sunshine Socks [Free Knitting Pattern]](https://hearthearthcrafts.com/wp-content/uploads/2025/04/blog-title-craft-sock-ladies-sunshine.png?w=1024)
Using the Long Tail method cast on 36 (36, 48) stitches and divide them over three needles, 12 (12, 16) stitches on each needle
Knit 2 Purl 2 rib for 2 (3, 3) cm
Knit the last row to stop colours mixing
Change colour if desired
Knitting the Sock Leg
Knit in the round until sock measures 13cm (15cm, 17cm)
Knitting the Sock Heel
![How to Knit Your Own Sunshine Socks [Free Knitting Pattern]](https://hearthearthcrafts.com/wp-content/uploads/2025/04/blog-embellishment-craft-sock-ladies-sunshine.png?w=1024)
Separate 18 (18, 24) stitches for the heel
Change yarn if desired
Work in Heel Stitch until heel is square – Knit 1, Slip 1 Purl wise. Purl on wrong side.
Once the heel is square turn the heel as follows:
Slip 1, Knit 11 (11, 15), SSK, Turn
Slip 1, Purl 5 (5, 7), P2Tog, Turn
Slip 1, Knit 5 (5, 7), SSK, Turn
Repeat the last two rows until 6 (6, 8) stitches remain. Ending with a knit row
Change yarn if desired
Pick up and knit an equal number of slipped stitches along each side of heel.
Split heel and instep stitches equally across two needles. The third needle has the stitches that will go across the top of the foot.
Knitting the Sock Instep
Row 1 – Knit across all three needles
Row 2, Needle 1 – K to last 3 st, SSK, K1
Row 2, Needle 2 – Knit across foot top
Row 2, Needle 3 – K, K2Tog, K to end
Repeat these 2 rows until 36 (36, 48) stitches remain
Knitting the Sock Foot
Knit until foot measures 13cm (16cm, 19cm)
Knitting the Sock Toe
![How to Knit Your Own Sunshine Socks [Free Knitting Pattern]](https://hearthearthcrafts.com/wp-content/uploads/2025/04/blog-accent-craft-sock-ladies-sunshine.png?w=1024)
Change yarn if desired
Knit another 1cm so that foot measures 14cm (17cm, 20cm)
Row 1, Needle 1 – K to last 3 st, SSK, K1
Row 1, Needle 2 – K1, K2Tog, K to last 3 st, SSK, K1
Row 1, Needle 3 – K, K2Tog, K to end
Row 2 – Knit across all three needles
Repeat these 2 rows until 8 (8, 10) stitches remain
Move stitches onto two needles.
Cast off in Kitchener Stitch as follows:
Set Up:
- From the Front of your work, Purl, leaving the stitch On the needle
- From the Back of your work, Knit, leaving the stitch On the needle
Kitchener:
- From the Front of your work, Knit, taking the stitch Off the needle
- From the Front of your work, Purl, leaving the stitch On the needle
- From the Back of your work, Purl, taking the stitch Off the needle
- From the Back of your work, Knit, leaving the stitch On the needle
Sew in The Ends
Use a knitters needle to sew in the ends of your yarn. Snip off the excess and your socks are done!
I do hope my sock Knitting project has inspired you to have a go at knitting your own socks with this free knitting pattern.
Follow me on your favourite social media channel for more crafty projects and knitting patterns.
![How to Knit Your Own Sunshine Socks [Free Knitting Pattern]](https://hearthearthcrafts.com/wp-content/uploads/2025/04/instagram-post-craft-sock-ladies-sunshine.png?w=1024)
Pin It Now, Knit It Later
Pin this Free Sock Knitting Pattern to your Pinterest board so that you can find it when you start your next sock knitting project.
![How to Knit Your Own Sunshine Socks [Free Knitting Pattern] Pinterest Pin](https://hearthearthcrafts.com/wp-content/uploads/2025/04/pin-4-craft-sock-ladies-sunshine.png?w=683)
A Little Bit About Me . . .
Thank you so much for stopping by my little corner of the interweb. I’m Bridie, mum to two small humans, full time homemaker and full time craftaholic – which totally explains why I’m always short on time!
I’ve included links to my favourite retailers for the products I’ve used to make my crafts. Click on any of the product images and links for full details. If you decide to buy any of these products I may get a small percentage of what you spend. There’s no cost to you at all.
