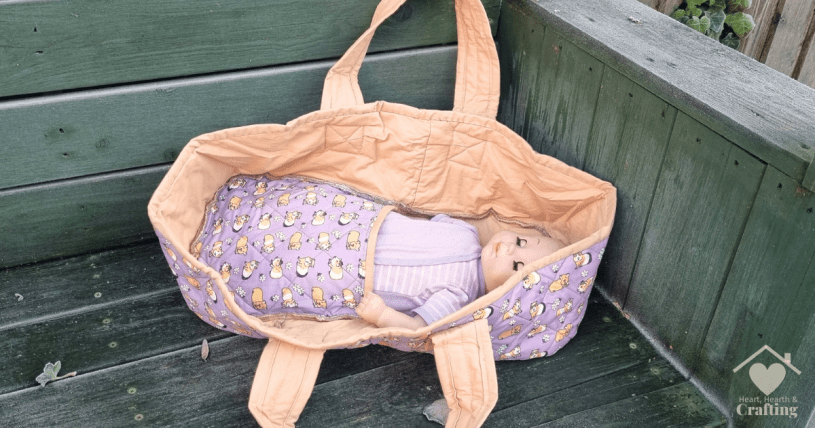
Sew your own Baby Doll Carry Cot with these free step by step instructions. This Baby Doll Carry Cot is perfect for tucking in a favourite doll or toting arounds their fury friends It’s super practical with easy to carry handles and of course it’s fully washable and endlessly customisable.
You’ll need basic sewing skills and tools to complete this project as well as wadding and your choice of fabric. This is an intermediate sewing project that is so worth the effort to see the joy on your kid’s face when they receive it!
Materials You Will Need to Sew Your Own Baby Doll Carry Cot
- Outer Fabric
- Lining Fabric
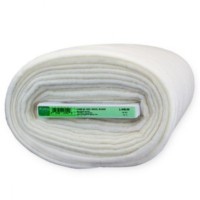
- Wadding
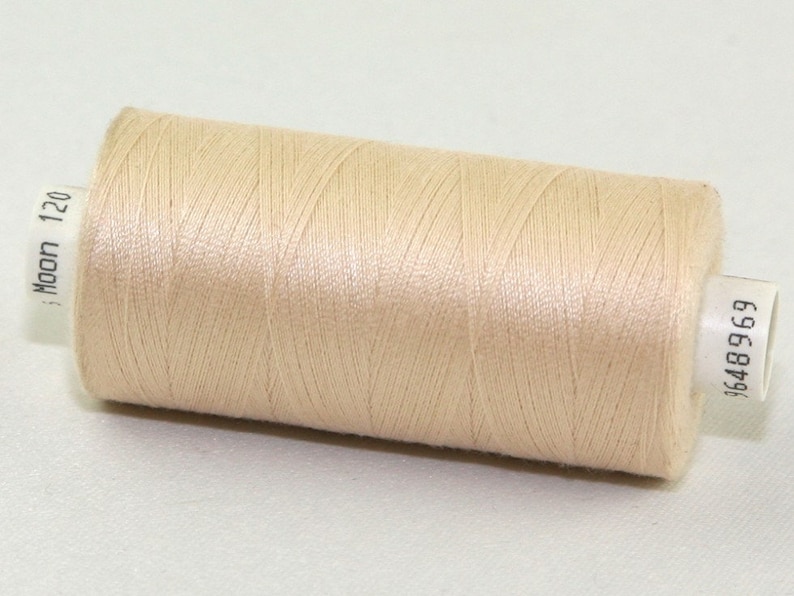
- Thread
![How to Sew a Baby Doll Carry Cot [Free Sewing Pattern]](https://hearthearthcrafts.com/wp-content/uploads/2024/01/blog-ingredients-sew-doll-carry-cot-lilac.png?w=1024)
You could use just about any fabric to sew your own Baby Doll Carry Cot but woven fabric such as cotton or polycotton will be the easiest to work with.
I am using this rather fabulous Guinea Pig print in cheap and cheerful polycotton fabric from Minerva Crafts. My kids are currently obsessed with their pet Guinea Pigs so they will love this fabric. I’m actually making this Carry Cot for the kids to transport and cuddle said Guinea Pigs.
For my lining fabric I’ve picked some plain peach polycotton fabric leftover from another project – this is a great scrap busting project!
I’m using good quality cotton wadding because I have some leftover from my quilting projects. Cheaper polyester wadding would do the job just as well.


I like Coats Moon Thread because it’s really good value and is suitable for most sewing projects.
You will also need basic sewing supplies like scissors, needles, pins, cutting, measuring and marking tools as well as a sewing machine. I guess you could sew this Baby Doll Carry Cot by hand but you’d need plenty of perseverance!
How to Sew a Baby Doll Carry Cot
Step 1 – Cut Out Your Fabric
Start by cutting out your fabrics.
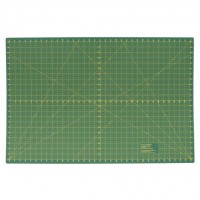
A rotary Cutter, ruler and cutting mat are extremely useful tools. You absolutely can make this Baby Doll Carry Cot without them but it will take a lot longer as you’ll need to mark the pieces on the fabric and then carefully cut them out with scissors. I honestly don’t know how I managed before I investing in a Rotary Cutter. It makes my sewing projects quick, easy and most importantly accurate.


You’ll need the following fabrics cut to these sizes.
- Base 10″ x 20″ Lining x 2
- Base 9″ x 19″ Wadding
- Bed Cover 10″ x 15″ Fabric
- Bed Cover 10″ x 15″ Wadding
- Bed Cover 10″ x 15″ Lining
- Sides 6″ x 50″ Fabric
- Sides 6″ x 50″ Lining x 3
- Sides 6″ x 50″ Wadding x 2
- Straps 2″ x 25″ Lining x 4
- Straps 2″ x 25″ Wadding x 2
- Binding 2.5″ x 170″+
Step 2 – Round the Corners of the Base
Use a round object (I used a side plate) to mark a curve across each corner of the base fabrics and wadding.
Make sure that the curves are even by measuring the same distance from each corner to the start / end of your curve. I used the marks on my cutting matt to make this super easy.
The wadding is an inch smaller than the lining fabrics. The curves on the wadding should also be smaller than the lining fabrics.
![How to Sew a Baby Doll Carry Cot [Free Sewing Pattern]](https://hearthearthcrafts.com/wp-content/uploads/2024/01/blog-step-1-sew-doll-carry-cot-lilac.png?w=1024)
Step 3 – Mark the Base Quilting
Mark your quilting lines on the base fabric.
I like to use erasable pens to mark fabric. The ink shows up brilliantly on lighter fabrics. The pens lines are precise. The ink completely disappears when the fabric is ironed or when it’s washed.

You can use any quilting pattern you fancy. I’ve gone for a simple diamond pattern that’s nice and easy to mark and stitch.
![How to Sew a Baby Doll Carry Cot [Free Sewing Pattern]](https://hearthearthcrafts.com/wp-content/uploads/2024/01/blog-step-2-sew-doll-carry-cot-lilac.png?w=1024)
Step 4 – Quilt the Base
Make a quilt sandwich with the base lining fabric, wadding and the marked base fabric. Lay them on top of each other and pin them together. I like to use safety pins for pinning quilt layers.

Stitch along the marked quilting lines. Remove the pins as you go.
Step 5 – Make the Binding
You can use shop bought binding if you wish but I like to make my own and this is how I do it.
Cut lengths of fabric 2.5″ wide. The longer the lengths, the better.
Join the individual lengths to make one long continuous length of binding fabric.
Place the ends of the lengths of fabric right sides together at right angles. Pin them together.
![How to Sew a Baby Doll Carry Cot [Free Sewing Pattern]](https://hearthearthcrafts.com/wp-content/uploads/2024/01/blog-step-3-sew-doll-carry-cot-lilac.png?w=1024)
Stitch across the right angle.
![How to Sew a Baby Doll Carry Cot [Free Sewing Pattern]](https://hearthearthcrafts.com/wp-content/uploads/2024/01/blog-step-4-sew-doll-carry-cot-lilac.png?w=1024)
Press the two pieces flat with the excess fabric pressed in opposite directions, just like pressing a seam open.
![How to Sew a Baby Doll Carry Cot [Free Sewing Pattern]](https://hearthearthcrafts.com/wp-content/uploads/2024/01/blog-step-5-sew-doll-carry-cot-lilac.png?w=1024)
Trim off the excess fabric.
![How to Sew a Baby Doll Carry Cot [Free Sewing Pattern]](https://hearthearthcrafts.com/wp-content/uploads/2024/01/blog-step-6-sew-doll-carry-cot-lilac.png?w=1024)
Fold the length of binding in half wrong sides together and give it a good press.
![How to Sew a Baby Doll Carry Cot [Free Sewing Pattern]](https://hearthearthcrafts.com/wp-content/uploads/2024/01/blog-step-7-sew-doll-carry-cot-lilac.png?w=1024)
I like to roll my binding around itself to keep it neat until I need it.
Step 6 – Quilt the Bed Cover
Mark quilting lines on the cover fabric in just the same way as you did for the base of the Carry Cot.
![How to Sew a Baby Doll Carry Cot [Free Sewing Pattern]](https://hearthearthcrafts.com/wp-content/uploads/2024/01/blog-step-8-sew-doll-carry-cot-lilac.png?w=1024)
Make a quilt sandwich with the cover fabric, wadding and lining. Pin the layers and stitch along the quilting lines.
![How to Sew a Baby Doll Carry Cot [Free Sewing Pattern]](https://hearthearthcrafts.com/wp-content/uploads/2024/01/blog-step-9-sew-doll-carry-cot-lilac.png?w=1024)
Place a length of binding along the 10″ edge of the quilted bed cover on the right side. Hold it in place so that the raw edges of the binding and the raw edges of the cover are lined up.
Stitch along this edge. I like to use a quarter inch seam.
Fold the binding to the wrong side of the quilted bed cover. Sew it in place.
You can stitch it by machine but your stitches will show on the right side of the bed cover unless you stitch in the ditch from the right side and make sure you catch the binding on the wrong side. I really struggle to do this neatly so I prefer to sew the back of my binding in place by hand. It does take longer but it’s a nice relaxing job to do in front of the TV so I don’t mind at all.
![How to Sew a Baby Doll Carry Cot [Free Sewing Pattern]](https://hearthearthcrafts.com/wp-content/uploads/2024/01/blog-step-9-sew-doll-carry-cot-lilac-1.png?w=1024)
Baste the completed bed cover to the base, stitching around the bottom and sides but leaving the top open.
Step 7 – Sides
The sides are made in two parts which are then sewn together at the top and bottom to give the carry cot extra stability.
The outer sides are made by layering the outer fabric, wadding and lining. The inside layer of the sides is made by layering lining, wadding and another layer of lining.
Assemble and quilt each sandwich in the same way as for the base and bed cover.
![How to Sew a Baby Doll Carry Cot [Free Sewing Pattern]](https://hearthearthcrafts.com/wp-content/uploads/2024/01/blog-step-10-sew-doll-carry-cot-lilac.png?w=1024)
Fold both of the sides in half right sides together so that the shortest ends meet. Stitch the two ends together so that the sides form a continuous loop.
![How to Sew a Baby Doll Carry Cot [Free Sewing Pattern]](https://hearthearthcrafts.com/wp-content/uploads/2024/01/blog-step-11-sew-doll-carry-cot-lilac.png?w=1024)
Place the inner loop (the one made from lining fabric only) inside the outer loop (the one made with the outer fabric). Pin or clip the top edges together and sew them together.
Sew the bottom edges together to make the next steps easier.
Position the loops around the base, right sides together. Clip them in place and stitch.
![How to Sew a Baby Doll Carry Cot [Free Sewing Pattern]](https://hearthearthcrafts.com/wp-content/uploads/2024/01/blog-step-12-sew-doll-carry-cot-lilac.png?w=1024)
I’ve finished the exposed edges with an overlocker. They could also be covered with binding for a neater finish.
Step 8 – Straps
The straps are made form a quilt sandwich too.
Layer the lining fabric, wadding and another layer of lining fabric.
Pin the layers together and sew a single line of stitching down the centre to secure them.
![How to Sew a Baby Doll Carry Cot [Free Sewing Pattern]](https://hearthearthcrafts.com/wp-content/uploads/2024/01/blog-step-13-sew-doll-carry-cot-lilac.png?w=1024)
Bind the edges in just the same way as you stitched the binding to the bed cover.
Position the straps along the outsides of the carry cot. Sew them in place by stitching a square and stitching diagonally through the centre to secure the strap really well.
![How to Sew a Baby Doll Carry Cot [Free Sewing Pattern]](https://hearthearthcrafts.com/wp-content/uploads/2024/01/blog-step-14-sew-doll-carry-cot-lilac.png?w=1024)
You can either tuck the raw edge of the strap under to conceal it or bind the shortest edge when you bind the sides of the straps.
I hope you have enjoyed this Baby Doll Carry Cot free sewing pattern.
Follow me on your favourite social media channel for more sewing patterns, inspiration and tips.
![How to Sew a Baby Doll Carry Cot [Free Sewing Pattern]](https://hearthearthcrafts.com/wp-content/uploads/2024/01/instagram-post-sew-doll-carry-cot-lilac.png?w=1024)
I do hope my Baby Doll Carry Cot sewing pattern has inspired you to have ago at sewing your own Baby Doll Carry Cot for your Little Miss.
Pop this post in your Pinterest board so you can find it later.
![How to Sew a Baby Doll Carry Cot [Free Sewing Pattern] Pinterest Pin](https://hearthearthcrafts.com/wp-content/uploads/2024/01/pin-2-sew-doll-carry-cot-lilac.png?w=683)
A Little Bit About Me . . .
Thank you so much for stopping by my little corner of the interweb. I’m Bridie, mum to two small humans, full time homemaker and full time craftaholic – which totally explains why I’m always short on time!

I’ve included links to my favourite retailers for the products I’ve used to make my crafts. Click on any of the product images and links for full details. If you decide to buy any of these products I may get a small percentage of what you spend. There’s no cost to you at all.

I just made this baby carry cot for my granddaughter’s Christmas present. The instructions are great and I’m excited about giving the finished product to her. She loves putting her dollys to bed! I didn’t make the sewn in blanket cover as I wanted a removable blanket. So I made a blanket and baby pillow to match! Thank you for making this pattern available.
LikeLike